This guide is to create your first Facebook Messenger chatbot in just a few minutes. You can even use this on your own business Facebook page and make it smart by adding real content.
Create a Facebook Page
A Facebook messenger chatbot works only on a Facebook page. So you must have a Facebook page. You can use your existing Facebook page or click here to create your first Facebook page.
Create a Facebook Application
It can be a bit confusing for non-programmer but a Facebook application is different from a Facebook page. Facebook Application is used by developers to connect with a mobile app, web apps or with bot engine.
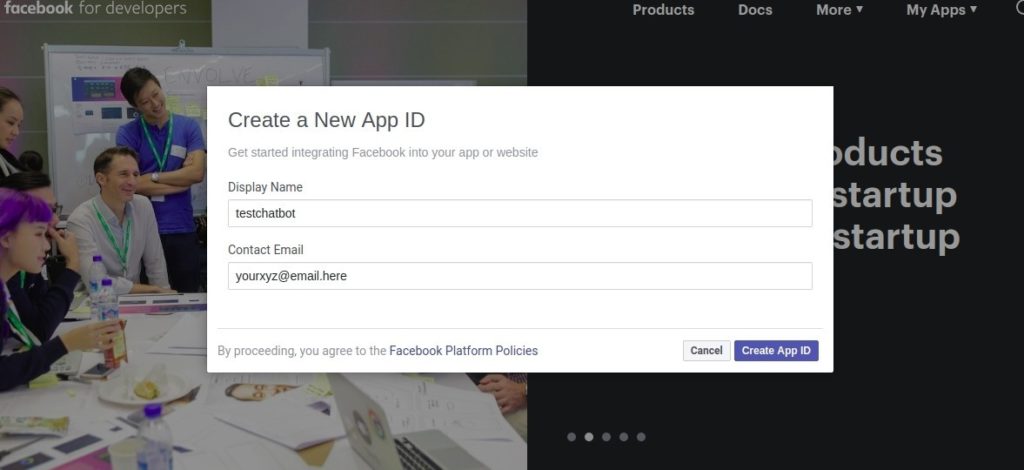
So you must have a Facebook developer account and click on “My Apps” and then “Create App” link.
DialogFlow Introduction & Setup
DialogFlow is a bot engine that provides developers to create a speech or text-based conversational user interface. They can recognize what we say or type and provide a response.
Simply, DialogFlow finds out what is user intent based on the user query, then decides what actions to take and then provides the response.
Below are the simple steps to setup DialogFlow :
- Create a DialogFlow Account and go to dashboard.
- Create a new Agent who will reply us on the Facebook Messenger chat.
- Let’s give it a sample training data, Create an Intent and give it a name “Intro”.
- Then go to training phrases and add a question which a user can ask about us. e.g “tell me something about you”
- Then add an action. e.g “about-you”. This will be triggerd if intent is matched.
- Then add a response. e.g “My name is Sandeep Kumar”
- And click on Save and try conversation at right section.
Connect DialogFlow & Facebook Application
You have to take following steps to connect DialogFlow and Facebook application.
Facebook Messenger Settings
- first go to your Facebook messenger app dashboard and click on “Set Up” under “Messenger” widget.
- You’ll be redirected to Messenger Setting page and here go to “Access Tokens” section and click on “Add or Remove Pages”
- Then choose the page you created in the first step and complete the step and you’ll be back to “Access Tokens” section.
- Here you’ll see your selected page and click on “Generate Token” to generate a required access token.
- One more step is to setup “A Callback Url” under “Webhooks” section but we’ll setup it later. so now back to DialogFlow side.
DialogFlow Settings
- Go to Integration and enable Facebook Messenger. Then click on Facebook Messenger title.
- Enter here “Page access token” you copied from facebook app setting.
- then enter your own a “Verify Token” which you’ll need later so remember it.
- And copy the callback url. and click on “Start”. Now it’s time to get back to Facebook App page and setup the webhook.
Go back to facebook app setting.
- Go to “Webhooks” section on Messenger setting page and click on “Add callback URL”.
- Enter here “Callback Url” you copied from DialogFlow setting in previous step.
- and Enter same “Verify Token” which you entered in DialogFlow Setting.
- Then click on “Verify & Save” and you’re done with connection between DialogFlow and Facebook Messenger
Test Facebook Messenger Chatbot
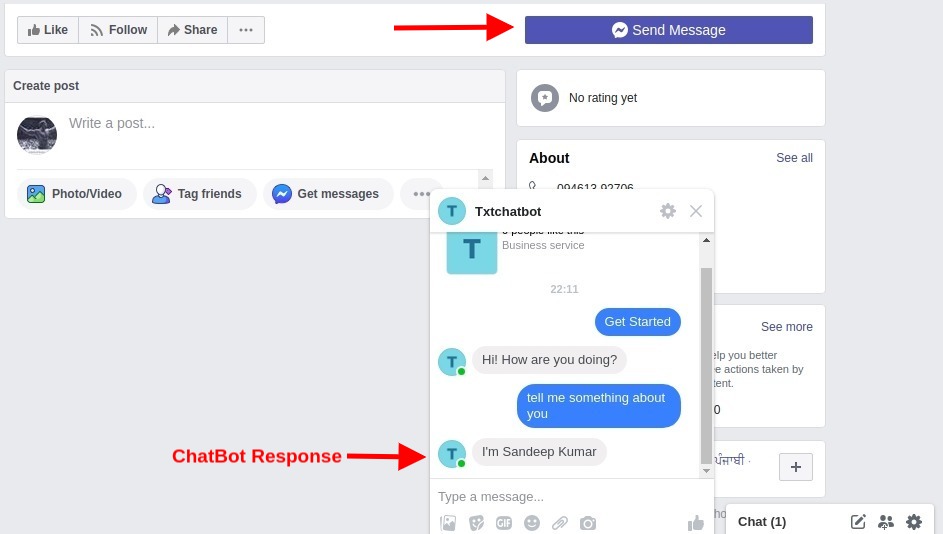
Go to your Facebook page as a visitor and click on “Send Message” and your Facebook messenger chat window will be opened up and you can type there “tell me something about you” and you’ll see the same response you entered in the Response Phrases.

Sandeep Kumar is the Founder & CEO of Aitude, a leading AI tools, research, and tutorial platform dedicated to empowering learners, researchers, and innovators. Under his leadership, Aitude has become a go-to resource for those seeking the latest in artificial intelligence, machine learning, computer vision, and development strategies.