This tutorial will guide you step-by-step to create a node.js app on localhost and then deploy it on Heroku and test on live URL
SETUP GITHUB REPOSITORY
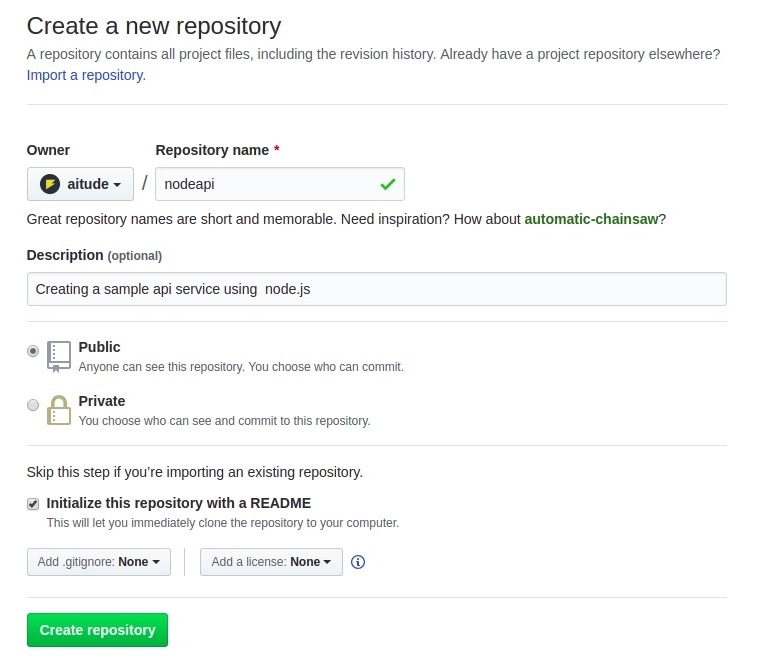
First, create a GitHub repository here and give it the name “nodeapi”. This repository will be used to keep our all nodejs code and then deploy code to heroku directly from this github repository.
Setup Project
Initialize the project using ‘npm init’ and enter ‘nodeapi’ as the name of the package and leave all other fields default.
npm initand enter ‘yes’ to finish the initialization process. A new ‘package.json’ file is created to manage all package dependencies. These package dependencies will be installed automatically on the Heroku server during the deploy process.
So, Install node.js packages required for the project.
npm install express --saveHello World App
create app.js file and put the below code to receive the HTTP request and send a response back.
var express = require('express')
var app = express()
var port = process.env.PORT || 5000
app.get('/',function(req,res){
res.send('Hello World! My app is ready to deploy.')
})
app.listen(port)
For testing at localhost, run the “node app.js” in the terminal and hit the 127.0.0.1:5000/ in the browser and you should see “’Hello World! My app is ready to deploy.’” message on the browser window.

Heroku
Heroku is a cloud platform as a service to deploy web apps written in several programming languages. It supports PHP, Python, Java, Node.js, Scala and many other languages.
Up to now, we have developed a hello world node.js app and tested it on the localhost. Now it’s time to deploy it on the server and test it via a live URL. So we’ll deploy this app on the HEROKU.
First, create a Heroku account here which is free for sandbox applications and then login to access the app dashboard page.
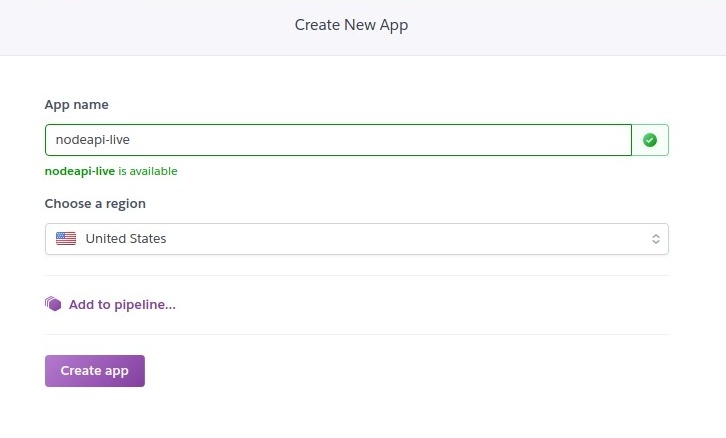
Here, tap on “New” dropdown on the right side and click on “create new app”.

Next, Enter the app name and choose the region. and click on Create app button. You’ll be redirected to the app dashboard page.
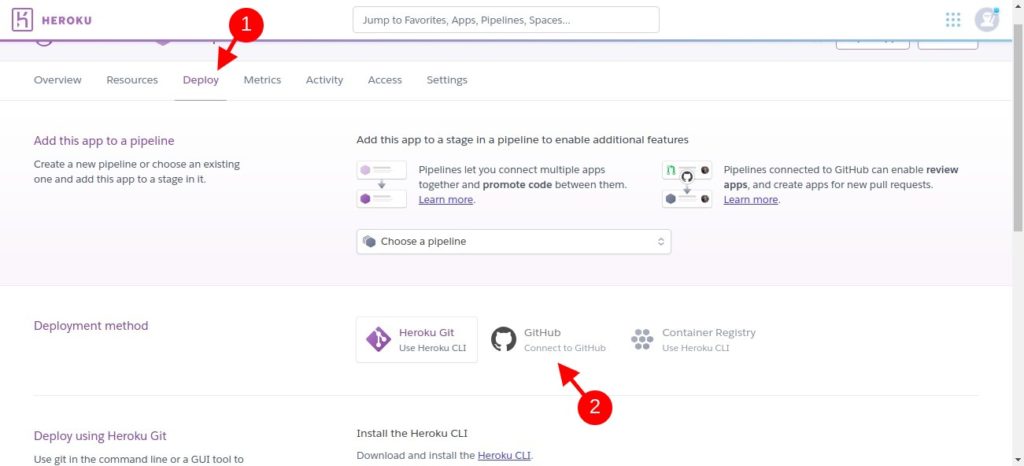
By default, you’ll be at the Deploy page. if not, you can click on the Deploy tab to setup the deployment method.
Connect to Git
Choose ‘Github’ as the deployment method and click on the GitHub icon to connect with the repository you created in the first step.
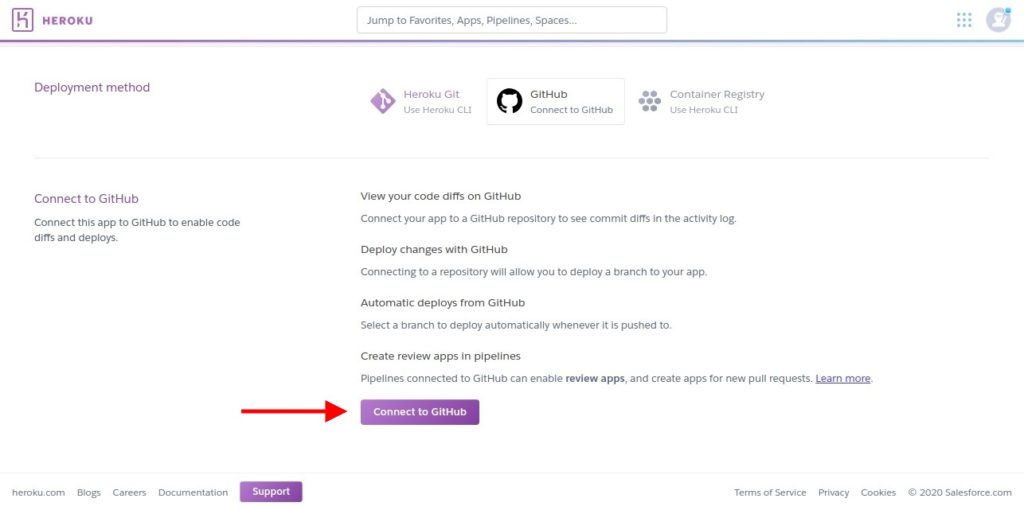
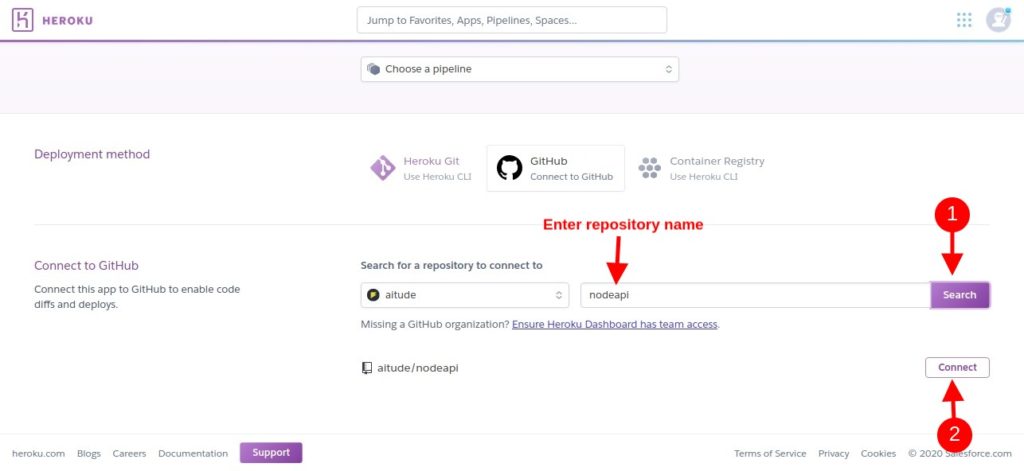
then you need to authorize the app to the GitHub account to access your repositories. Click on the “Connect to GitHub” button and authorize the app.
After authorization, Enter a search text and click on the Search button. and then find your repository in the search list and click on the Connect button.
Choose Deployment Method
There are two methods to deploy code on the Heroku server using a git repository. The first is Automatic deployment and the other is Manual deployment.
- Automatic Deployment – Every push to a specific branch will deploy a new version of this app. So once you push code to the repository, a deploy process will trigger on Heroku automatically. Learn more here.
- Manual Deployment – No change will be made on Heroku when you push code on the git repository. You have to manually click on the Deploy Branch button to create an immediate deployment of any branch. Click here to learn more about manual deployment.
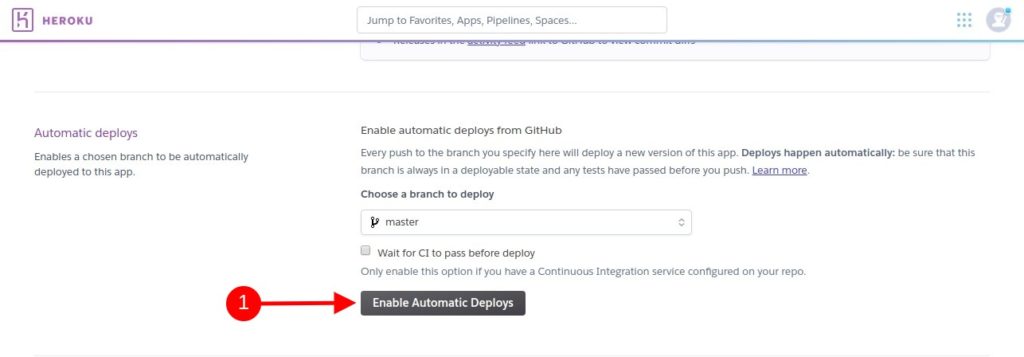
We’ll choose the Automatic Deployment method in this guide and our code will deploy on Heroku automatically on pushing code into Master branch. So choose the ‘Master’ branch to deploy and click on the “Enable Automatic Deploys” button.
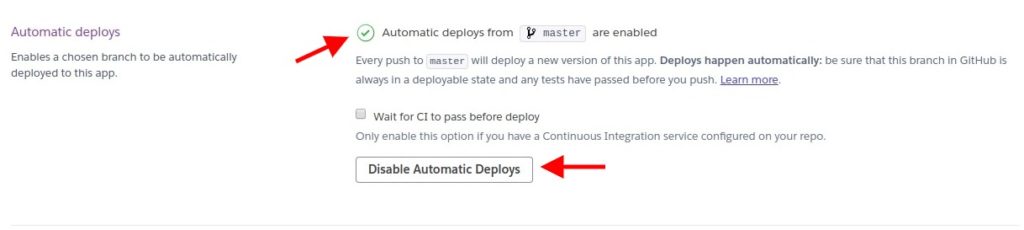
And we’re done with deployment method and you see a setup confirmation and you can disable this automatic deployment anytime.
Deploy Node.js Code on Heroku
Heroku requires a “Procfile”, without any extension, to execute the app. So create a Procfile and put the below code into the file.
web: node app.jsNow we just need to push our code into the Master branch to nodeapi github repository and then we can test our app using a live url.
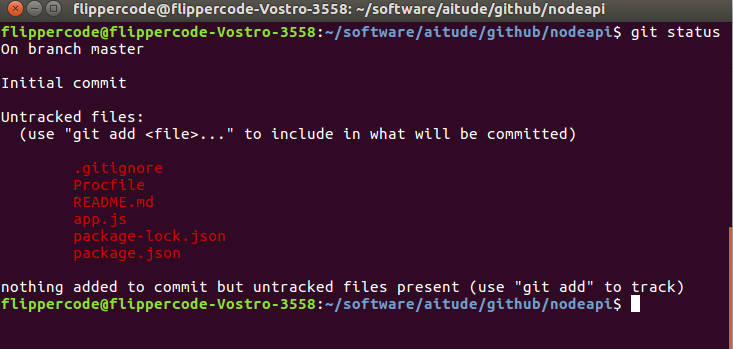
- First, run ‘git status’ command to make sure what will be committed. Add a .gitignore file in your folder to avoid node_modules folder.
- Run “git add .” to track changes.
- Then run “git commit -m ‘deploy on heroku’.
- And finally, run “git push origin master” to push code into Master branch.
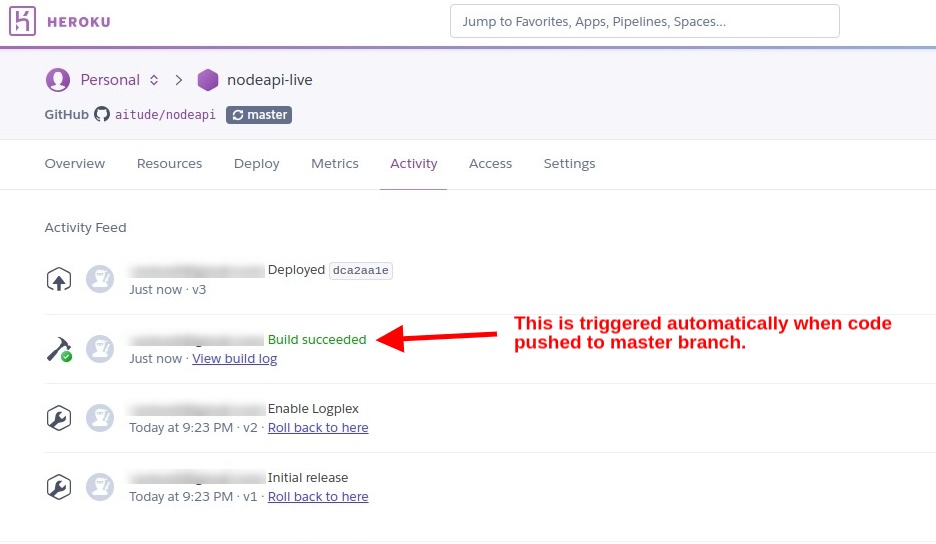
Go back to Heroku App Dashboard and click on the “Activity” tab. Notice that a build process is executed automatically and code has deployed. This happens just after the code pushed on the git.
Test Node.js APP on Heroku
Now go to the App Dashboard and click on the “Open App” button. And you’ll be redirected to your node.js app live.

And your first node.js app is live now on Heroku.

Sandeep Kumar is the Founder & CEO of Aitude, a leading AI tools, research, and tutorial platform dedicated to empowering learners, researchers, and innovators. Under his leadership, Aitude has become a go-to resource for those seeking the latest in artificial intelligence, machine learning, computer vision, and development strategies.