


You have an image. You don’t know where it came from, whether it’s real, or whether someone stole it from you. Reverse image search solves all of that – in seconds.
- What Is Reverse Image Search?
- How to Reverse Image Search on Google (Desktop)
- How to Do a Reverse Image Search on iPhone and Android
- Free Reverse Image Search Tools That Actually Work
- AI-Powered Reverse Image Search: What’s Changed
- Which Tool Should You Actually Use?
- 5 Real Use Cases (and Which Tool Wins Each)
- 1. Verifying if a news image is real
- 2. Finding the original photographer of a photo you want to license
- 3. Identifying a product from a screenshot
- 4. Checking if someone’s profile photo is fake
- 5. Protecting your own images from theft
- FAQ
- Conclusion
This guide covers exactly how reverse image search works, how to do it on Google (desktop and mobile), which free and AI-powered tools actually deliver results, and when to use each one. No padding. No generic tool lists you’ve seen everywhere else.
What Is Reverse Image Search?
Reverse image search is a technology that lets you use an image as your search query instead of typing words. Upload a photo, paste a URL, or drag an image into a search engine – and it finds where that image appears online, shows visually similar results, and often identifies the objects, people, or places in it.
The key technology behind this is a “digital fingerprint.” When you upload a photo, the system generates a feature vector – a mathematical representation of the image’s visual characteristics (color patterns, edge data, object shapes). It then matches that fingerprint against billions of indexed images.
Modern tools, especially AI-powered ones, go further: they understand what’s in the image, not just what it looks like.
Featured snippet answer: Reverse image search lets you upload a photo to find its source, locate similar images, or identify objects and people. Google Lens, TinEye, and Bing Visual Search are the most widely used tools. It works by analyzing an image’s visual “fingerprint” and matching it against indexed images across the web.
Common mistake: People assume reverse image search only finds exact copies. It doesn’t. Modern tools find visually similar images, cropped versions, recolored edits, and sometimes entirely different images that share key subjects.
How to Reverse Image Search on Google (Desktop)
Google’s reverse image search is built into Google Images and powered by Google Lens. Here’s the fastest way to use it on desktop:
Method 1 – Upload an image from your computer:
- Go to images.google.com
- Click the camera icon in the search bar
- Select “Upload a file” and choose your image
- Google returns visually similar images and pages where the image appears
Method 2 – Search by image URL:
- Right-click any image on the web → “Copy image address”
- Go to images.google.com → camera icon → “Paste image link”
- Hit Search
Method 3 – Chrome shortcut (fastest): Right-click any image on any webpage → select “Search image with Google”. A sidebar opens instantly with Lens results – no new tab needed.
Pro tip most guides miss: If you’re getting too many unrelated results, use Google Lens’s crop tool to focus on a specific region of the image – a logo, a face, a product – before running the search. Accuracy improves dramatically.
How to Do a Reverse Image Search on iPhone and Android
This is where most guides get confusing. The short answer: use Google Lens, which is baked into several apps.
On Android
Android has Google Lens built into the default camera app on most devices.
- Open the Google app → tap the camera icon in the search bar
- Upload from your gallery or take a photo live
- Results appear immediately – tap any dot on the image to drill into a specific object
Alternatively, long-press any image in Chrome for Android → tap “Search image with Google Lens”.
On iPhone
iOS doesn’t have native Google Lens integration, but you have two clean options:
Via the Google app (easiest):
- Download the free Google app from the App Store
- Tap the camera icon → choose a photo from your library
- Google analyzes it and returns similar images and web sources
Via Chrome on iPhone:
- Open Chrome → navigate to any page with an image
- Long-press the image → tap “Search image with Google Lens”
Via Google Photos (for your own photos):
- Open Google Photos → select an image
- Tap the Lens icon below the photo
- Adjust the focus area if needed, then view results
Common mistake on mobile: Many people switch to “desktop mode” in Safari to access Google Images. You don’t need to. The Google app or Chrome gives you Lens directly, which is more accurate than the old web upload method anyway.
Free Reverse Image Search Tools That Actually Work
Google is the obvious choice, but it’s not always the best. Here’s an honest look at the free options:
Google Lens
Best for: General searches, product identification, landmark recognition, real-time camera search
Google’s database is the largest in the world. For most everyday searches – finding a product, checking if a photo is real, identifying a plant or building – Google Lens wins on sheer coverage. It’s also the only tool with live camera integration built into Android.
Limitation: It’s less effective at detecting image reuse across older or less-indexed websites.
TinEye
Best for: Tracking where a specific image has appeared online over time
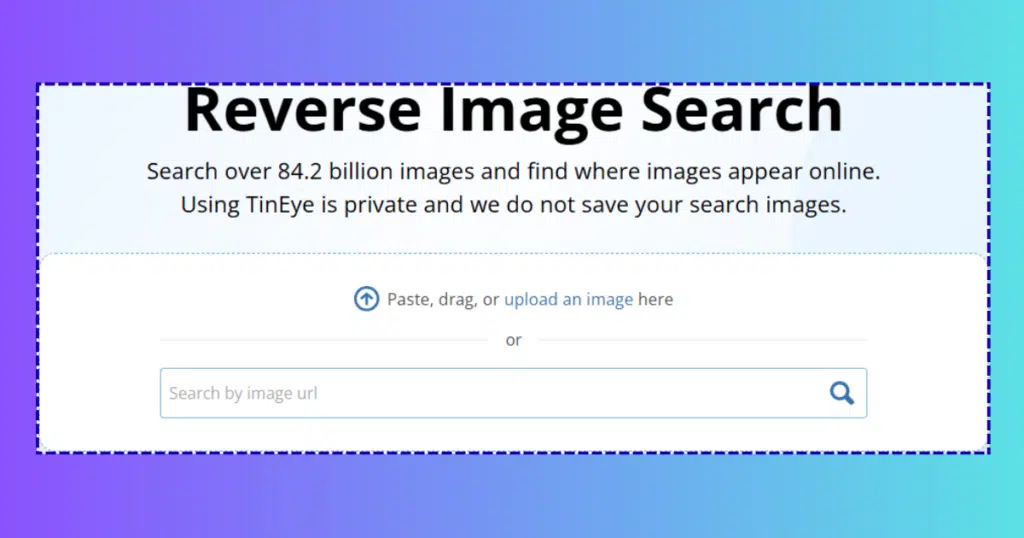
TinEye has indexed over 70 billion images and returns results sorted by first appearance date – making it the go-to tool for copyright research and finding the original source of a photo. It’s the only major reverse image search engine that focuses specifically on exact and near-exact matches rather than visual similarity.
Free plan: 150 searches/week. Paid plans available for higher volume.
Bing Visual Search
Best for: Product shopping, finding items from lifestyle images
Bing’s visual search is genuinely underrated. It’s particularly strong at identifying products – clothing, furniture, electronics – and pulling up direct shopping links. If you screenshot something from Instagram or Pinterest and want to buy it, Bing often outperforms Google.
Yandex Image Search
Best for: Finding people, Eastern European or Russian-language content
Yandex’s facial recognition capabilities are notably stronger than Google’s for locating photos of individuals across the web. It also indexes many regional sites that Google misses. Important caveat: use responsibly and be aware of privacy implications when searching for people.
Practical tip: For professional image verification or copyright checks, run the same image through both Google Lens and TinEye. They pull from different index pools. Google catches recent and widely distributed images; TinEye catches older and more niche usage.
AI-Powered Reverse Image Search: What’s Changed
Standard reverse image search matches pixels. AI-powered tools understand meaning.
The difference matters. A standard tool finds copies of your image. An AI tool can tell you: “This is a photo of a mid-century Eames lounge chair, likely from the 1960s, photographed in natural light.” It answers what the image contains, not just where it appears.
Beyond reverse search itself, the same AI shift now powers a broader class of AI image tools that combine visual search, stock and AI-generated libraries, and editing in a single workflow
What AI has added to reverse image search:
Multimodal understanding: Tools like Google Lens now combine visual recognition with language models. You can upload a photo of a dish and ask “what are the ingredients in this?” and get a recipe – not just similar images.
Object-level search: AI lets you tap a specific part of an image and search for just that element. See a lamp in a room photo you like? Tap it, and Google searches for that lamp specifically.
Cross-platform source tracing: Newer AI tools index social media platforms (Instagram, Pinterest, Reddit) in addition to standard web pages – helping creators track where their content has been reposted without credit.
AI image detection: Some reverse image search tools now flag images as likely AI-generated based on artifact patterns and metadata analysis. This has become increasingly useful as AI-generated imagery floods social platforms.
Tools worth knowing in this space: Google Lens (built-in, free, multimodal), Bing Visual Search (strong product AI), TinEye (copyright-focused, non-AI but precise), and emerging tools like Pixsy (paid, designed specifically for photographers protecting their work).
Which Tool Should You Actually Use?
| Task | Best Tool | Why |
|---|---|---|
| Everyday quick search | Google Lens | Largest database, fastest on mobile |
| Find original source / copyright check | TinEye | Oldest-first sorting, precise match |
| Product identification & shopping | Bing Visual Search | Strong product AI, shopping links |
| People search / profile verification | Yandex | Stronger facial indexing |
| Bulk copyright monitoring (pro) | Pixsy | Automated monitoring + legal tools |
| Live camera identification | Google Lens (Android) | Only tool with real-time camera |
The honest verdict: Start with Google Lens. If you need copyright provenance, add TinEye. If you’re shopping from an image, try Bing. Using all three for critical searches takes 2 minutes and gives you the most complete picture.
5 Real Use Cases (and Which Tool Wins Each)
1. Verifying if a news image is real
A photo is circulating on social media claiming to show a recent event. Is it real, or is it an older image reposted out of context?
Use: TinEye (sort by oldest) + Google Images. If the image’s earliest appearance predates the claimed event, it’s likely misattributed.
2. Finding the original photographer of a photo you want to license
You want to legally use a beautiful landscape photo but it’s unattributed.
Use: TinEye first (gives chronological history), then Google to cross-reference the earliest result. The domain hosting the oldest copy is often the source.
3. Identifying a product from a screenshot
You saw a sofa on a design blog but there’s no link. You screenshot it.
Use: Bing Visual Search. It’s built for this – product-focused AI with shopping integrations often returns direct purchase links.
4. Checking if someone’s profile photo is fake
A connection request from someone you don’t know. Their profile photo looks too good to be true.
Use: Google Lens + Yandex. If the photo appears on dozens of other accounts or stock photo sites, it’s likely a fake profile.
5. Protecting your own images from theft
You’re a photographer and want to know where your images are being used without credit.
Use: Pixsy (paid but purpose-built) or a weekly manual check using TinEye. For high-volume protection, Pixsy automates monitoring and even helps with DMCA takedowns.
[Link to: your article on image copyright and DMCA takedowns | anchor text: how to protect your images from unauthorized use]
FAQ
How do you reverse image search on Google?
Go to images.google.com, click the camera icon, and upload your image or paste its URL. In Chrome, you can right-click any image and select “Search image with Google” for instant results powered by Google Lens.
Is reverse image search free?
Yes – Google Lens, TinEye (up to 150 searches/week), Bing Visual Search, and Yandex Image Search are all free. Paid tools like Pixsy add monitoring, alerts, and legal support for professional photographers.
Can I reverse image search on my phone?
Yes. Download the Google app on iPhone or Android, tap the camera icon in the search bar, and upload or photograph any image. Chrome on mobile also supports long-pressing images to trigger a Lens search.
What is reverse image search used for?
The main uses are: verifying the source of a photo, checking whether an image is stolen or reused, identifying products from photos, spotting fake social media profiles, and finding higher-resolution versions of images.
Is reverse image search AI?
Modern reverse image search tools use AI – specifically computer vision and deep learning – to analyze images. Google Lens goes further with multimodal AI, letting you ask questions about image content in natural language.
Can reverse image search find AI-generated images?
Some tools are beginning to detect AI-generated images by analyzing artifact patterns and metadata. However, no tool reliably catches all AI images yet. Detection works best combined with contextual judgment – unusual lighting, perfect skin textures, impossible backgrounds.
Conclusion
Reverse image search has moved well beyond a novelty. Whether you’re fact-checking a viral photo, tracking down a product, or protecting your creative work, knowing how to use these tools is practical digital literacy in 2026.
Three things to remember: Google Lens covers the most ground for everyday searches. TinEye is the right tool when you need chronological provenance. And running two tools on the same image takes 60 seconds and dramatically improves your confidence in the result.
Start with the right-click in Chrome. It’s the fastest path to finding what you’re looking for – and you probably have it open already.

Sandeep Kumar is the Founder & CEO of Aitude, a leading AI tools, research, and tutorial platform dedicated to empowering learners, researchers, and innovators. Under his leadership, Aitude has become a go-to resource for those seeking the latest in artificial intelligence, machine learning, computer vision, and development strategies.