


An AI image can look impressive and still miss the brief. The subject changes shape, the background becomes too busy, or a watercolor idea turns into something closer to a product photograph. When you use reference images for AI art, the challenge is deciding which information each image should contribute.
- What Do Reference Images Actually Control?
- How the Reference Image Workflow Works
- Step 1: Define the Subject and the Details That Must Stay
- Step 2: Add a Scene and a Compatible Style
- Step 3: Review the Brief Before Judging the Finish
- Step 4: Change One Input and Save the Decision
- A Small Practice Brief: One Lantern, Three Settings
- Reference Images vs Text Prompts vs Manual Compositing
- Common Reference Image Problems and What to Change
- Where This Workflow Is Most Useful
- Frequently Asked Questions
- Do I Need Three Reference Images?
- Can a Style Reference Keep a Character Identical?
- When Should I Stop Regenerating?
- Conclusion
Tools such as Whisk AI make this approach accessible through subject, scene, and style references. It is a browser-based image creation platform that presents visual remixing as a starting point for exploration. The useful skill is learning to separate those inputs, describe what matters, and review what the generator actually produced.
This guide explains that process with a fictional camping-lantern illustration brief. It is a planning exercise, not a product benchmark. The accompanying images are conceptual illustrations, not screenshots or measured results from the linked tool.
What Do Reference Images Actually Control?
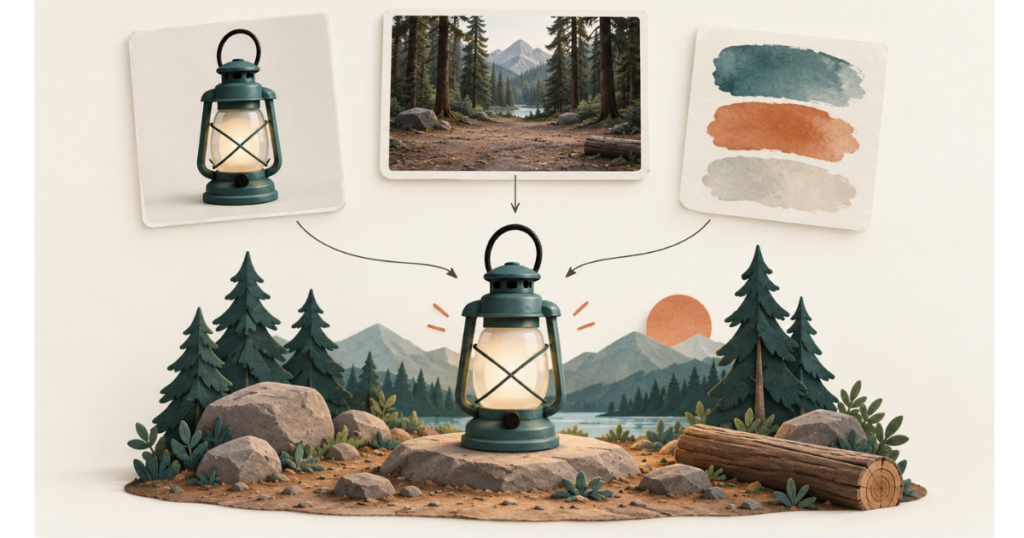
A reference image gives a generator visual information alongside any written instructions. What happens next depends on the tool and mode. Some features influence the overall appearance; others guide composition or the interpretation of a subject. An upload field does not automatically preserve every detail in a picture.
It helps to distinguish three jobs:
- Subject: the person, object, or character you want the viewer to recognize.
- Scene: the setting, spatial arrangement, and environmental context.
- Style: the medium, palette, texture, and overall visual treatment.
These are useful planning categories, even when a tool uses different labels. A style reference is not the same as an identity reference. For example, matching the colors and brushwork of a painting does not necessarily preserve the exact object shown in it.
Before uploading anything, complete this sentence for each image: “Use this for ___, but do not carry over ___.” A campsite photograph might establish the environment without contributing its people, tents, or dramatic sunset colors. A watercolor sample might supply soft edges without supplying its flowers.
A useful reference image has one clear job in the creative brief. If you cannot explain that job, adding the image may make the next result harder to judge.
How the Reference Image Workflow Works
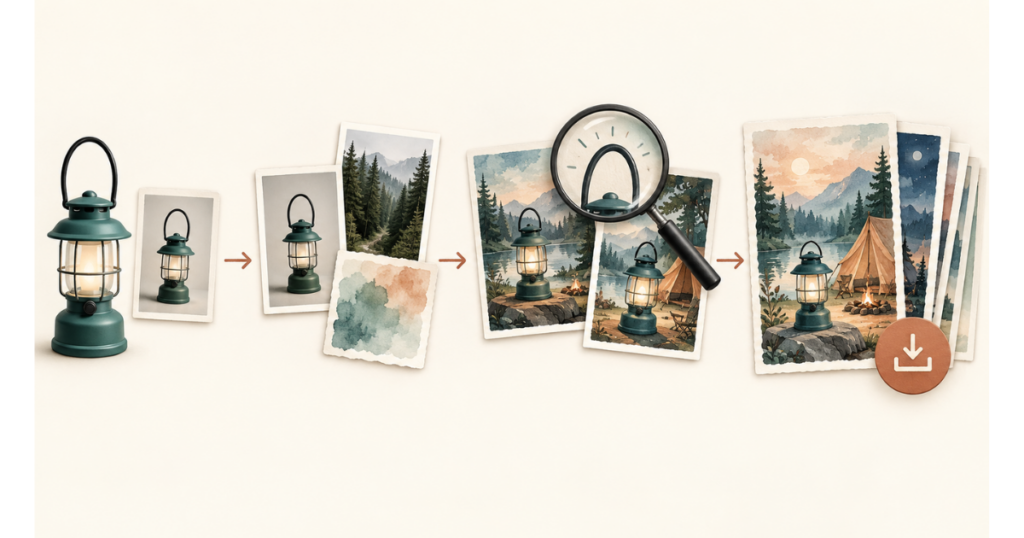
The following steps turn a folder of visual inspiration into a brief you can revise without changing every input at once.
Step 1: Define the Subject and the Details That Must Stay
Start with a clear subject image. Prefer a view that shows the silhouette and important features, without heavy shadows or overlapping objects. If the reference is crowded, prepare a simpler crop while keeping the details you need.
For the lantern exercise, write down three requirements: a teal body, a black loop handle, and a round base. Then record what may change: the setting, illustration medium, and surrounding props. This small list becomes the review standard.
Upload the subject in the relevant mode or reference field. Ask whether the tool offers subject guidance, style guidance, or general image-to-image generation; those functions are not interchangeable. If it only accepts one image, begin with the subject and describe the setting in text. You can still separate the roles in your brief.
Step 2: Add a Scene and a Compatible Style
Choose a scene with a plausible place for the subject. In this example, a campsite with a clear foreground is easier to describe than a crowded festival photograph. State where the lantern should sit and how large it should appear relative to nearby objects.
Next, choose a style sample that communicates the desired treatment clearly. A limited watercolor palette is a more focused instruction than a collage containing photography, comic art, and polished 3D renders. Use your own or appropriately licensed material.
Keep the written description consistent with the images. A starting prompt could be:
A teal camping lantern with a black loop handle and round base, standing on a flat rock in a quiet pine campsite. Watercolor illustration with soft edges and a muted palette. Leave breathing room around the lantern. No lettering.
This is an example brief, not universal syntax. Adjust it to the tool’s supported controls. If the initial direction is confused, remove a reference before adding more descriptive phrases.
Step 3: Review the Brief Before Judging the Finish
Generate an initial result and compare it with the requirements from Step 1. Check the subject first, then the scene, then the style. A beautiful forest does not compensate for a missing handle if the handle is part of the intended design.
Inspect both a small preview and the full-size image. The preview helps you judge focal point and clutter. The larger view reveals broken outlines, implausible attachments, stray objects, or inconsistent material details.
Write a specific observation, such as “the handle is correct, but the lantern blends into the trees.” That suggests a contrast or placement revision. “It looks wrong” does not tell you which input to change.
If a seed or model setting is exposed, record it with the prompt and reference filenames. It can help document the attempt, but it is not a guarantee that another model version will reproduce the same image.
Step 4: Change One Input and Save the Decision
Keep a copy of the initial result. Change the input most closely connected to the problem: the subject reference for an unclear silhouette, the scene for crowding, or the style sample for an unwanted finish.
For example, if the lantern is recognizable but the setting feels too photographic, keep the subject and scene while simplifying the style direction. Compare the revision with the previous result using the same requirements. Random variation still matters, so one improved image does not prove that a change always works.
Save the accepted image together with its prompt, references, available settings, and a short decision note. This makes a later revision easier to explain, even when exact regeneration is unavailable.
A Small Practice Brief: One Lantern, Three Settings
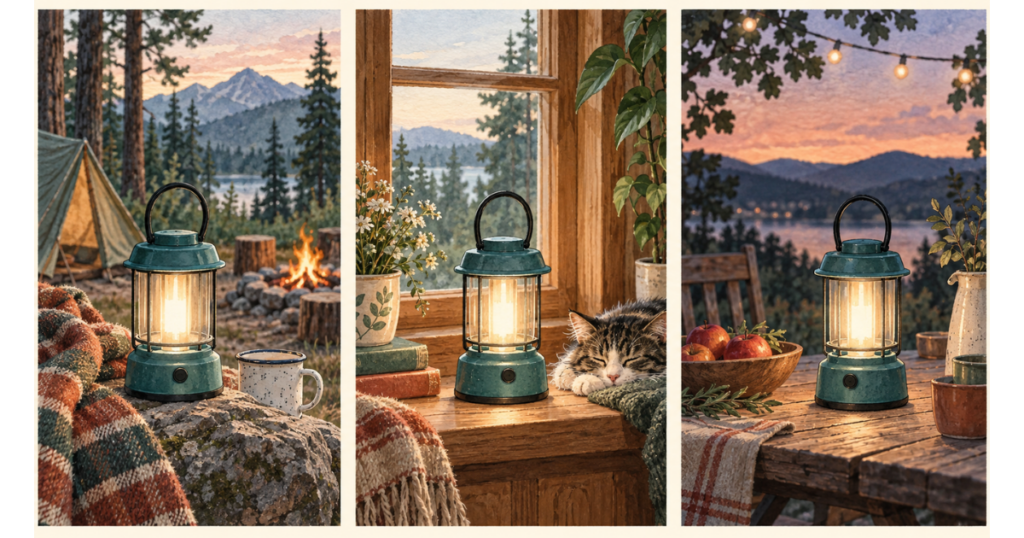
Use the same fictional lantern in a campsite, on a cabin windowsill, and on an outdoor table. Keep the three subject requirements and the watercolor direction unchanged. Replace only the environment description and scene reference for each setting.
Before generating, decide how you will compare the set. Can a viewer recognize the same basic object? Is the palette compatible across the three images? Does each setting have a believable surface supporting the lantern? These questions are more useful than asking which image is prettiest.
Record each attempt in a simple log: filename, changed input, retained details, visible problem, and next action. For instance, “cabin-v02; changed scene; teal body retained; handle partly hidden; request a clearer angle” is a useful example entry. It is not a reported test result.
If one setting repeatedly hides a required feature, simplify that composition before trying an entirely new style. If exact hardware, dimensions, or branding must match a real product, use an approved product image and controlled editing or compositing instead of treating a remix as a faithful reproduction.
Reference Images vs Text Prompts vs Manual Compositing
These approaches offer different kinds of control, so choose according to the brief rather than expecting one method to solve every problem.
| Criteria | Whisk AI reference workflow | Text-only generation | Manual editing and compositing |
| Starting point | Images assigned distinct visual roles | A written description of the scene | Selected source images and layers |
| Main skill | Reference selection and visual review | Clear description and prompt revision | Selection, masking, and color matching |
| Iteration effort | Replace a reference and reassess | Rewrite descriptions and compare outputs | Edit chosen elements directly |
| Subject control | Guided resemblance requiring inspection | Described features requiring inspection | Direct control of retained pixels |
| Best use case | Exploring related visual directions | Exploring ideas without reference assets | Producing a precisely specified composition |
| Main limitation | Details can change during generation | Visual intent can be misinterpreted | Requires suitable assets and editing skill |
The reference workflow is especially useful when you already know the visual direction but struggle to describe it. Manual work becomes more valuable as the brief demands exact details. These methods can also be combined: explore the composition first, then finish it with controlled edits.
Common Reference Image Problems and What to Change
The subject loses its distinctive features. Check whether the selected mode is meant to guide identity or only style. Use a clearer subject reference and remove competing objects. If an exact match remains essential, move to an editing method that preserves the relevant source pixels.
The background overwhelms the subject. Choose a simpler scene, specify placement, or reduce the amount of surrounding detail. Repeating “high quality” does not resolve an unclear hierarchy.
The style drifts between images. Keep the style sample and core description stable while changing the scene. Remove conflicting directions such as “photorealistic watercolor 3D render” unless that mixture is genuinely part of the brief.
Colors match but the object changes. Treat appearance and identity as separate checks. A shared palette can make a set feel related while hiding structural differences.
The result contains inaccurate labels or product details. Add approved text and exact branding in an editor. Do not publish an invented feature as though it were part of a real product.
Reference-based generation should be reviewed against the brief, not accepted because the output looks polished.
Where This Workflow Is Most Useful
For blog illustrations, references can help establish a recurring visual direction. Check that the imagery communicates the article’s actual topic, and write descriptive alt text for the final image.
For social content series, reuse a small set of approved visual ingredients. Inspect each crop separately because a composition that works horizontally may lose its subject in a vertical frame.
For storyboards and concept development, the workflow helps explore how a subject could fit different settings. Treat the images as proposals; continuity, anatomy, and physical details still need review before production.
Reference images do not remove the need to check source permissions, upload privacy, or the selected service’s current usage terms. Avoid confidential client material unless the upload is approved. Generation controls and results also vary across tools and model versions.
Frequently Asked Questions
Do I Need Three Reference Images?
No. Start with the information the brief needs and the inputs the tool supports. One clear subject image plus a concise description can be a better starting point than several conflicting references.
Can a Style Reference Keep a Character Identical?
Not by itself. Style guidance concerns appearance, while identity requires attention to defining features and the tool’s specific capabilities. Review each image rather than assuming continuity.
When Should I Stop Regenerating?
Stop when the image meets the brief, or when the remaining problem requires precise editing that generation is not reliably delivering. Keep the accepted version and its inputs so the next task starts with a documented direction.
Conclusion
Begin with a recognizable subject, give every reference a clear role, and decide what must stay before generating. Then revise the input connected to the visible problem. For beginners, that repeatable process is a stronger foundation than collecting more images or making every prompt longer.

Sandeep Kumar is the Founder & CEO of Aitude, a leading AI tools, research, and tutorial platform dedicated to empowering learners, researchers, and innovators. Under his leadership, Aitude has become a go-to resource for those seeking the latest in artificial intelligence, machine learning, computer vision, and development strategies.